Introducing an efficient solution for displaying a WooCommerce product filter in the sidebar, even when constructing the product page using a page builder – the Themify WooCommerce Product Filter plugin.
The Themify plugin offers a distinct approach compared to the conventional WooCommerce product filter widgets. With its user-friendly drag-and-drop form builder, users can effortlessly create multiple filter combinations to cater to their specific requirements.
Notably, the WooCommerce Product Filter plugin provides live search functionality, ensuring that users receive instant and accurate search results. Compatible with all theme builders, this intuitive plugin offers a seamless user experience.
If you have installed both WooCommerce and Woo Essential plugins on your website, please proceed to install the Themify – WooCommerce Product Filter plugin.
Create a new Product Filter
First, install the Themify Woo Product Filter on your WordPress dashboard.
Check the Screenshot below.
In your WordPress Dashboard menu option, go to Product Filters > Product Filters > Add New. You’ll notice a layout of the filter with everything you need to create the filter.
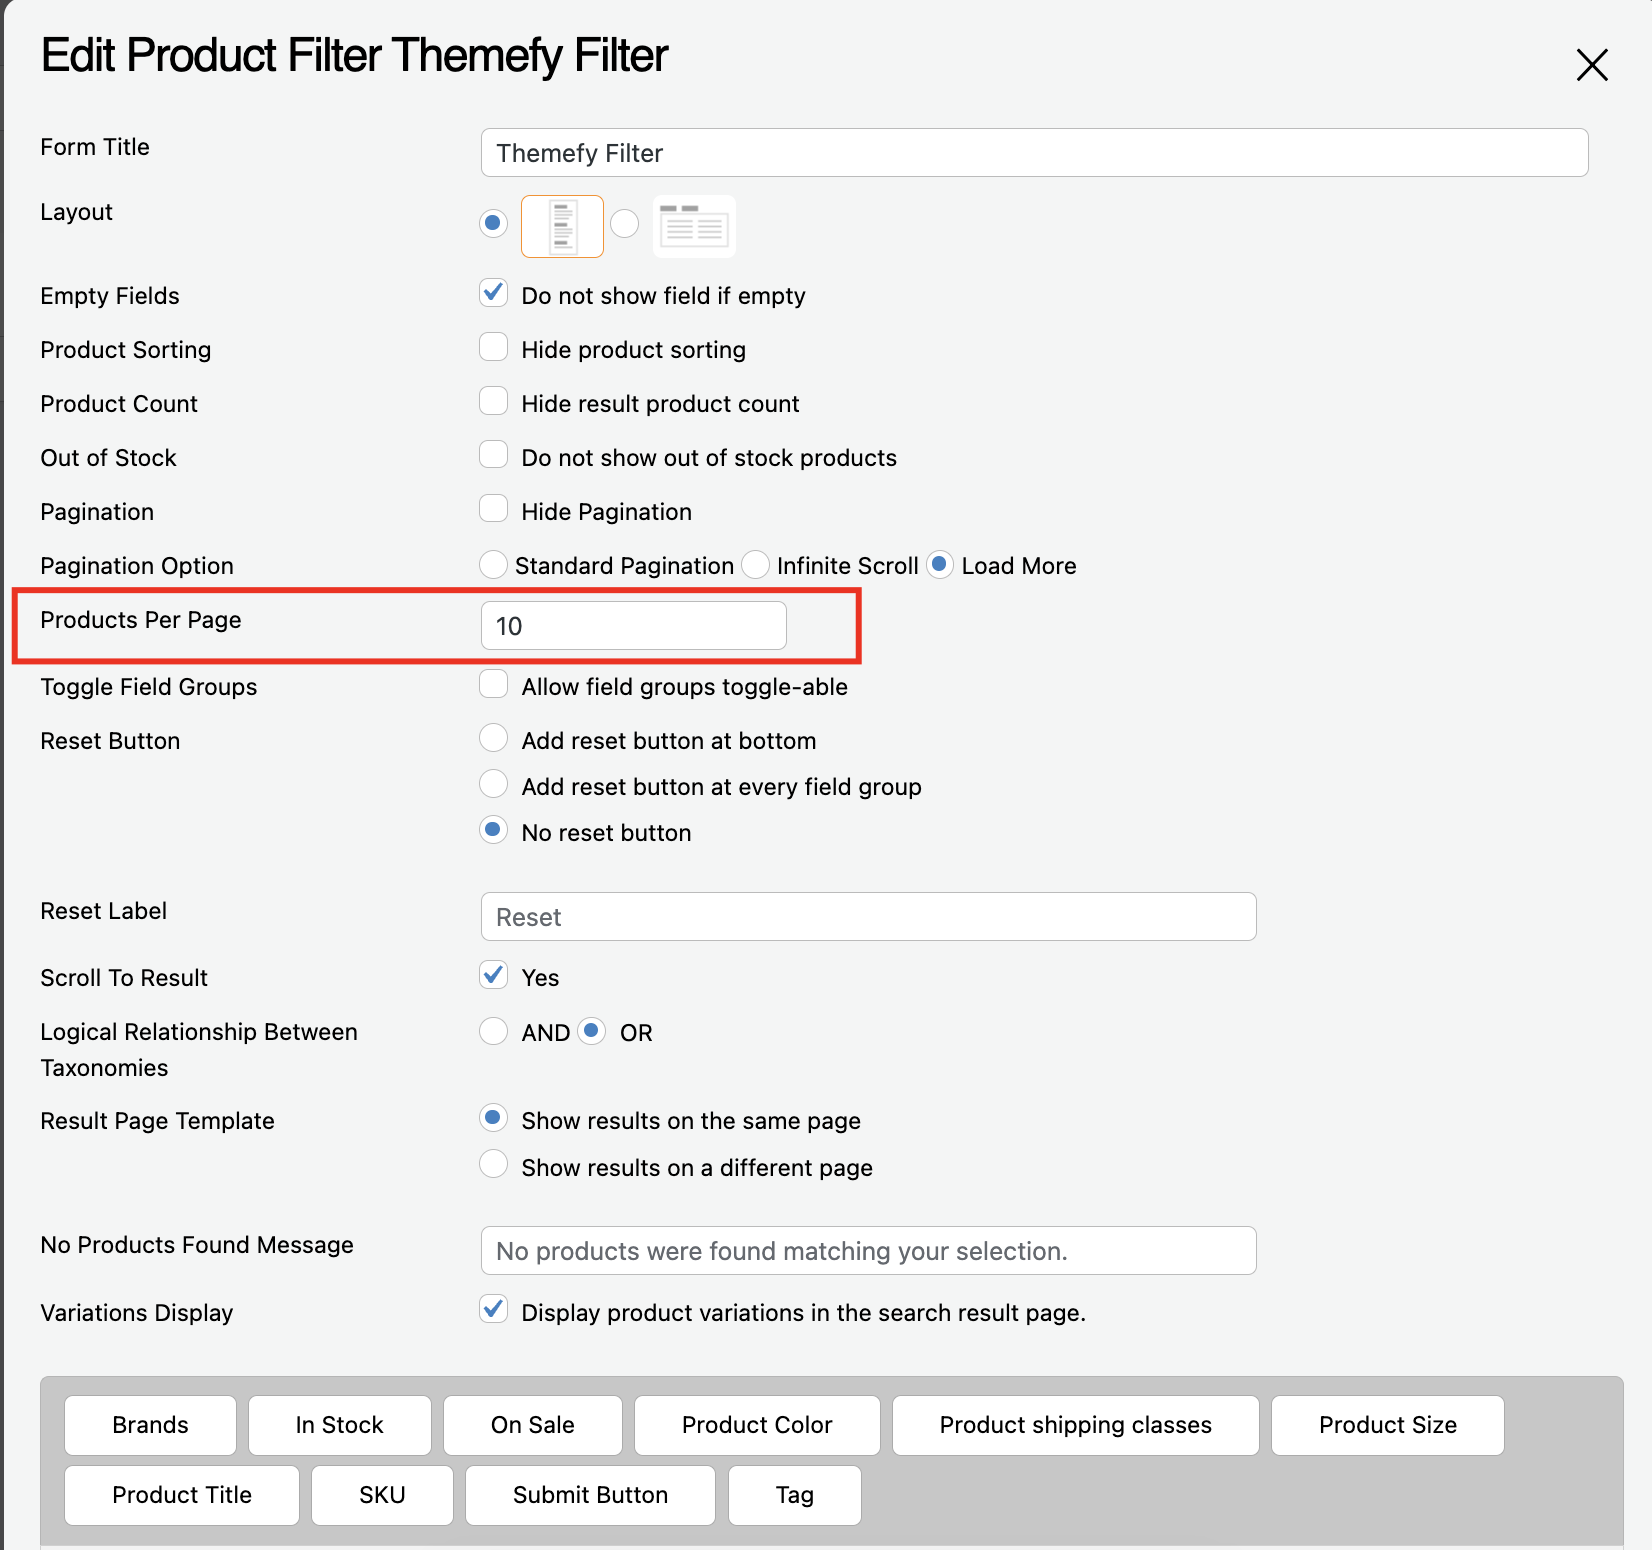
Go through the settings to create your shortcode. Give it a title that describes the filter.
Please make sure themefy products per page and our module products per page are both the same.
You can decide whether to display empty fields, product sorting, product counts, and out-of-stock products. You can also choose between a vertical or horizontal layout. Choose between a regular, infinite scroll, or load more, and whether or not to display pagination. Enter how many items there are on each page. You can add the modules as much as you can
Check the screenshot and then decide which module you need, then one by one keep it in the empty space. By selecting the category module, you will encounter the following scenario:
After keeping all modules, just hit the save button.
Finally, if you go to the WordPress Dashboard > Product Filters. Here you will notice a shortcode will appear. We will use this shortcode for achieving our goal.
Now, Using the Themify – WooCommerce Product Filter with Woo Product Module.
Step 1. First Go to Divi Theme Builder. WordPress Dashboard > Divi > Divi Theme Builder. There you will notice a box “Add new template”
Step 2. To initiate the process, kindly access the “Add a New Template” option. Upon doing so, you will come across two distinct choices, namely “Build New Template” and “Add from Library”. Proceed by selecting “Build New Template” which will present a template interface.
Within the template options, kindly locate and select “All Product Category Pages”. Subsequently, proceed to the Archive page and click on the designated “Create Template” button to continue.
Step 3. Now you may notice the following screenshot:
To begin, please select the “Add Custom Body” option and proceed by clicking on “Build Custom Body“.
To proceed, follow these steps:
- Create a row and designate two columns within it.
- In one column, take the Woo Product Grid Module.
- In the other column, insert the Code Module.
- Within the Code Module, input the product filter code as instructed.
By adhering to these guidelines, you will successfully integrate the product filter functionality into your desired layout.
Step 4. Here, you need to install the Themify plugin from WordPress.org and then click on “Add new”
Collect the shortcode After installing Themify plugin on your WordPress website. Click on WordPress Dashboard > Product Filters. From here you can easily collect the shortcode.
Step 5. Now go to the WordPress dashboard, then go to the Product Filters menu. Copy the shortcode.
Step 6. In this step go to the WordPress Dashboard> Theme Builder and there on the shop page, in a row keep 2 columns, 1 will be the place of Woo Product Grid module and in another take the code module. In the code module, keep the shortcode.
While in column 1, taking the Woo Product Grid module, just open the settings and from the content tab enable the current page must.
Step 7. Create the same type of template for the “All Product Category Pages” and “All product tags Pages”.
While creating the template in the Divi Theme builder, just select the All Product Category pages and also the All Product Tags Pages.
Step 8. After completing the above processes, now just go to the theme builder and click on “All Changes Saved”. Now go to the shop page and check the page. Now you may notice the following screenshot:
Final Thoughts
In conclusion, we have explored the process of creating filtered WooCommerce sidebars for pages constructed with the Divi Builder. The user-friendly plugin offers an array of filtering capabilities for WooCommerce products, allowing the creation of multiple filters and their placement on any desired page. Additionally, Woo Product module features enable customization, and the plugin’s shortcode functionality allows integration within sidebars or modules.


