To configure the Woo ajax search module of the Woo Essential plugin, you can follow these steps:
Step 1:
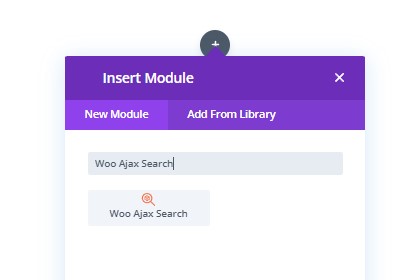
Open the Divi Builder: To add a new step to a Woo ajax search module in Divi, you need to first open the Divi Builder for the page or post where the module is located. You can do this by clicking the “Use Divi Builder” button when editing the page or post.
Step 2: Edit the Woo Ajax Search module:
Once you’re in the Divi Builder, locate the Woo Essentials “Woo Ajax Search” module you want to add a new step to and click on the module to edit it.
Step 3: Configure the Woo Ajax Search
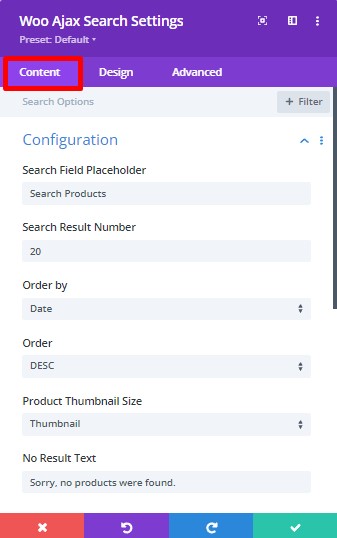
In the “Search Field Placeholder” field, enter the text that you want to appear in the search box before the user types anything. For example, you could enter “Search products.”
In the “Results Count” field, enter the number of search results that you want to display. For example, you could enter “20.”
In the “Order By” dropdown, select the order in which you want the search results to be displayed. The available options are relevance, date, price, and rating. In the “Order” dropdown, select whether you want the search results displayed in ascending or descending order.
In the “Product Thumbnail Size” dropdown, select the size of the product thumbnail that you want to display in the search results. The available options are thumbnail, medium, medium large, and full.
In the “No Result Text” field, enter the text that you want to display when there are no search results. For example, you could enter “Sorry, no products were found.”
Step 4: Configure the Search Area
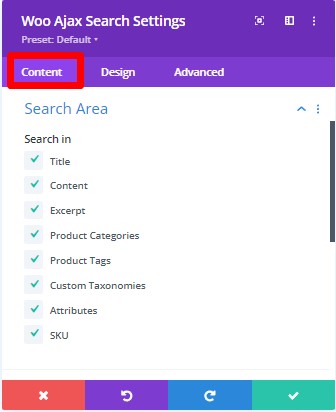
In the “Search Area” section, you will see several checkboxes that allow you to select the areas where the search should be conducted.
The available options are
Content: This option searches for keywords in the product description and any other text associated with the product.
Title: This option searches for keywords in the product title. Excerpt: This option searches for keywords in the product excerpt.
Product Categories: This option searches for products in the selected categories. Product Tags: This option searches for products with the selected tags.
Custom Taxonomies: This option searches for products with the selected custom taxonomies.
Attributes: This option searches for products with the selected attributes.
SKU: This option searches for products with the specified SKU. Select the checkboxes for the areas where you want the search to be conducted.
Step 5: Configure the Display:
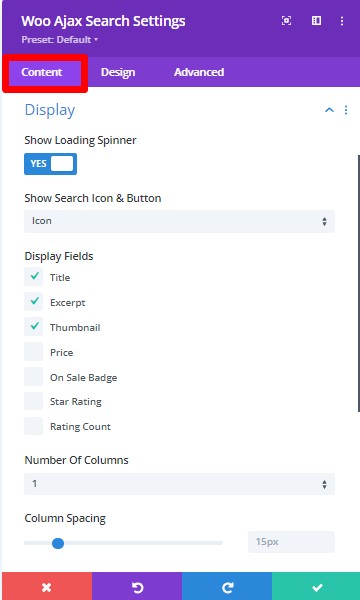
In the “Display” section, you will see several options that allow you to customize how the search results are displayed.
The available options are
Show Loading Spinner: If you select this option, a loading spinner will be displayed while the search results are being loaded.
Show Icon and Button: If you select this option, an icon and button will be displayed next to the search box. The icon and button can be customized in the “Icon” and “Button Text” fields.
Display Fields: This option allows you to choose which fields are displayed in the search results. You can select from title, price, excerpt, add to cart button, and product image.
Number of Columns: This option allows you to set the number of columns in which the search results are displayed. You can choose from 1 to 6 columns.
Column Spacing: This option allows you to set the spacing between the columns in the search results. You can choose from small, medium, and large.
Use Masonry: If you select this option, the search results will be displayed using the Masonry layout. This option is useful if you have products with different heights and widths. Select the options that you want to use for the display settings.
Step 6: Configure the Category option
Under the woo ajax search module settings, you will find the “Category” option.
The “use current category” option in Ajax Search is a feature that allows the search to be limited to the current category the user is browsing. This means that if the user is browsing a certain category or subcategory, the search results will only show products or information related to that category.
For example, if a user is browsing the “clothing” category of a website and uses the search function with the “use current category” option selected, the search results will only show products related to clothing, such as shirts, pants, and shoes. This can be a useful feature for users who want to quickly find products or information related to the category they are browsing without having to filter through irrelevant search results.
Here, you can enable the option to show categories in the search results by toggling the toggle switch to “Show Category Section.”
You can also specify the position of the category display by selecting the desired option from the “Category Position” dropdown menu.
If you want to include specific categories in the search, you can select them from the “Include Categories” option. Simply click on the dropdown menu and choose the categories you want to include.

Step 7: Customize the Scrollbar:
Show Scrollbar: The “Show Scrollbar” feature displays a scrollbar on the search results page, which can help users navigate through a large number of search results more easily.
Hide Scrollbar: The “Hide Scrollbar” feature hides the scrollbar, which can help to create a cleaner, more minimalist interface.
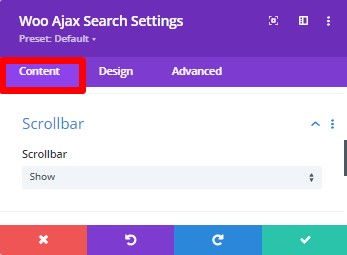
Step 8: Design the Woo Ajax Search Module
The design of the Woo Ajax Search Module of the Woo Essential plugin can be done in a few simple steps. Here’s how you can do it:
Search Field: The search field is where the user enters the search term. You can customize the design of the search field by adjusting its size, border, and spacing. You can also change the color and font of the text inside the search field. To do this, go to the “Search Field” tab in the Woo Essential plugin’s settings and make the necessary changes.

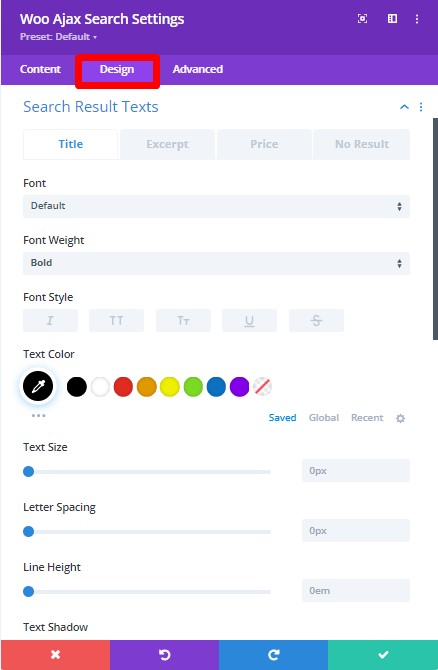
Search Result Texts: The search result texts are the product titles that appear in the search results. You can adjust the font size, font weight, line height, color, and padding to match your website’s design, and you can do it including the title, excerpt, price, and no result options.
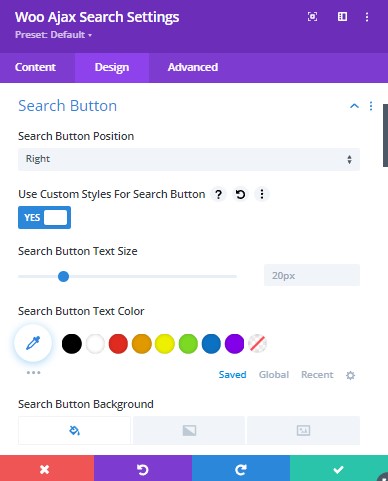
Search Button: The search button is the button that users click to initiate the search. You can adjust the width, height, font size, font weight, color, and background color to match your website’s design. Here you can enable the search button’s position.
Search Icon and Loader: The search icon and loader are visual cues to users that a search is in progress. You can adjust the size, and color, of the icon and loader. You can adjust the size and color of the search icon and loader.
Category: The category is the product category that appears in the search results. You can adjust the font size, font weight, color, and padding of the selected, list, and size options.
Feature Image: The featured image is the product image that appears in the search results. You can adjust the size, spacing, and border to match your website’s design.
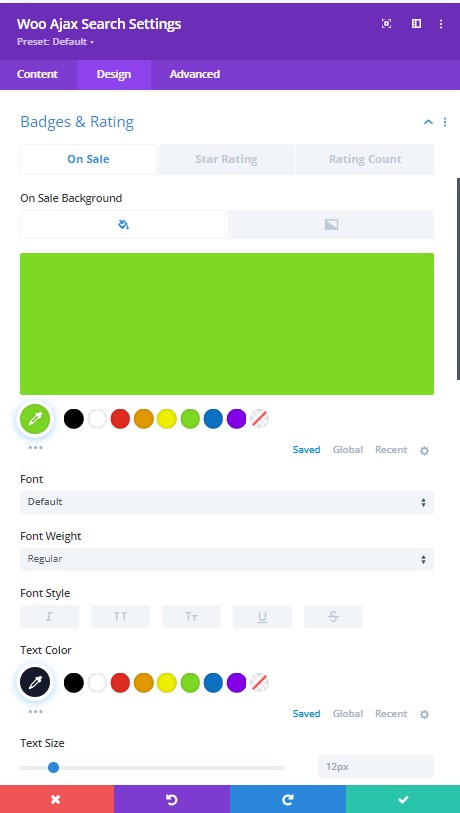
Badges and Ratings: The badges and ratings appear in the search results and indicate the product’s popularity and quality. You can adjust the size, spacing, and border.
Step 9. Update the Woo Ajax Search configuration:
Once the new step has been added and configured, you can update the Woo Ajax Search module’s configuration by clicking the “Save & Exit” button in the bottom right-hand corner of the screen. This will save the changes you’ve made to the flow and update its configuration.
Step 10. Test the Woo Ajax Search:
After adding the new step and updating the configuration, it’s important to test the Woo Ajax Search module to ensure that the new step functions correctly and doesn’t break the existing search. You can do this by previewing the page or post and interacting with the ajax search to see if the new step is working as expected.
Step 11. Publish the page or post:
Finally, when you’re satisfied that the new step has been added correctly, you can publish the page or post so that others can use the updated Woo ajax search module.
